
Javascript Environment Variables: Tips, Tricks, and Best Practices

98% of websites use Javascript for client-side programming, according to W3techs’ 2022 survey. Javascript is a must have for any web developer’s toolbox. And the good news is you can also use Javascript for server side programming thanks to NodeJS, created by Ryan Dahl. You can quickly become fullstack with only one programming language.
One key concept you need to master is environment variables. Using environment variables is really easy with NodeJs as you just require one package: dotenv. But misusing environment variables leads to serious security threats. This why you need to use the right tool and practices to make sure your environment variables are in the right place, encrypted, and safely accessible for your team. This is what we are going to see in the following article.
What’s a Javascript Environment Variable
Javascript environment variables can be API keys, URLs, database credentials―anything you need to configure a specific environment really. Some are sensitive so they should never be shared as-is in your code or in public, but others are simply useful constants to have around that you only want to define once.
Instead of having your database creadentials hardcoded, you might for example want to have a .env file in which you put your admin username, password and cluster for MongoDB, like so:
DATABASE_ADMIN="adminUserName"
DATABASE_PASSWORD="greatPassWord!IsNtIt?"
DATABASE_CLUSTER="clusterName"
Defining environment variables is as simple as that, but you need extra steps to secure them throughout your development workflow.
Why Using Environment Variables
Environment variables prevent you from hardcoding secrets in your code. Hardcoding secrets puts you at risk of leaking secrets to the world, which is terrible for your company’s brand and for you as a profesionnal developper.
Second, environment variables allow you to define constants on a global scope, accessible to every piece of your project. They not only make it easy to refer to recurring values, but also easily change them as your codebase or your environment evolve.
Lastly, environment variables are commonplace in NodeJS projects, so you might as well learn how to make the best of them.
How To Use Environment Variables In Javascript / NodeJS
1. Creating a .env file
Create a new NodeJS project:
mkdir new-project
cd new-project
npm install
npm init
git init
Then, install the package “dotenv” with the following command:
npm i dotenvThen, simply create a .env file and add it to your .gitignore:
touch .env
touch .gitignore
To ignore a .env file, simply add a line to your .gitignore. A .env file contains sensitive information, you never want to have it appear in your repository nor in your commit history.
Defining new environment variables is as simple as adding a new line to the .env file:
MY_ENV_VAR="this is an environment variable's value"2. Using an environment variable in Javascript
Using an environment variable with NodeJS requires the dotenv package we previously installed. If I want to connect my Express application to my MongoDB database, hardcoding the database’s credentials in the code isn’t safe because anybody who can read the code can access it:
mongoose.connect("mongodb+srv://userName:greatPassWord@$clusterName.aaaaaaa.mongodb.net")Instead, we use a .env file:
DATABASE_USER="userName"
DATABASE_PASSWORD="greatPassWord"
DATABASE_CLUSTER="clusterName"
Now, thanks to dotenv, you can require your variables in your js file without leaking secrets:
require('dotenv').config()

dbUser = process.env.DATABASE_USER
dbPassword = process.env.DATABASE_PASSWORD
dbCluster = process.env.DATABASE_CLUSTER

mongoose.connect(`mongodb+srv://${dbUser}:${dbPassword}@$${dbCluster}.aaaaaaa.mongodb.net`)
Anytime you need to change an environment variable, you can just modify the .env file and re-start the NodeJS program.
3. Creating environment variables on Linux / Unix
.env files are simple to use for a temporary development environment, but they are terrible for security anywhere else. Many things can go wrong: you can either forget to add the .env file to .gitignore and leak sensitive information in your repository, but you can also inadvertently publish the file and have it accessible for anyone on the Internet without the proper server permissions. Toyota recently suffered a data breach by exposing a secret key on Github, for example.
In production, the best practice is to directly create environment variables in your container or operating system by using a .bashrc file. Linux powering 90% of web servers out there, let’s see how it’s done in a Linux environment.
Creating an environment variable is as simple as opening you terminal and using the export command:
export ENV_VAR = key
echo $ENV_VAR
# output: key
Now back in your code, you should be able to have access to your environment variable the same way as before:
require('dotenv').config()
console.log(process.env.ENV_VAR)
// output: "key"
But this variable is non-persistent, meaning your variable will be gone when you close the terminal.
If you use a web hosting service, you’ll be able to directly configure persistent environment variables from the user interface. On your own machine, you can create persistent environment variables by using the .bashrc file:
nano .bashrcAnd insert your environment variables like so:
export ENV_VAR = keyAnytime the system boots up, the variable is created. You can now use your environment variable in your code without any .env file! Unlike .env files which are stored in a project’s repository which can be public, you can never leak .bashrc files unless you explicitly want to share them. It’s a huge improvement.
If you want deeper insights on how to create and use environment variables on Linux, check our article on the subject.
4. Securing environment configs with Onboardbase
You might have noticed already, but this approach isn’t very convenient either. A modern dev team relies on multiple external services with their own API keys for example, and you’ll quickly loose sight of them if you have to manually create and update environment variables for each project. Unsynced variables are just as bad from a security perspective! You need to use the right tool to make sure your environment variables are in the right place, encrypted, and safely shareable with fine-grained accesses rights.
This is why you need Onboardbase to make environment variables management easy and secure.
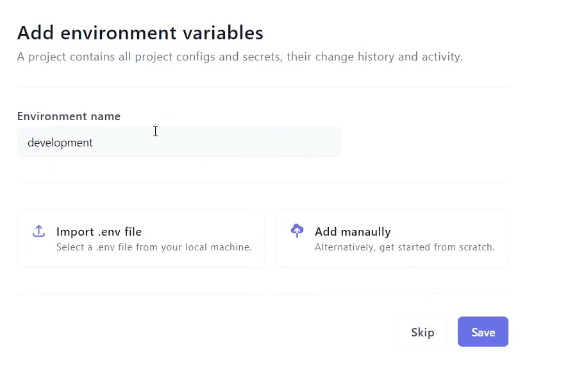
After creating an account, you can define environment variables from the web interface and bring in your team. Each variable is stored encrypted, and your teammate can only access the minimum they need to work:
Then, using environment variables in your project is as simple as installing a package and running a command line.
First, install Onboardbase’s CLI:
npm i -g @onboardbase/cli@latestNow you can use the setup command to configure your project.
onboardbase setupThis generates an Onboardbase .yaml file that doesn’t contain any sensitive information. It’s only used to access the central repository:
setup:
	project: projectname
	environment: development
All you need to do is run the build command to inject you environment variables from Onboardbase at run time:
onboardbase build --command = "npm run start"All your project’s environment variables are now accessible through your usual process.env object from NodeJS! Whenever you update variables in your Onboardbase interface, the changes are synced in all related projects. Your dev team doesn’t need to share sensitive information over Slack or play with their OS, it’s all there in a centralized vault!
Use Onboardbase To Secure Environment Variables
We showed you in this article how to create environment variables in javascript and how you can get rid of all the cons of using .env files.
With Onboardbase, you can create, secure, share and import environment variables from a single web interface, while directly working with them with your usual dotenv package. For using environment variables with your favorite frontend javascript framework, see our dedicated articles on the blog or check our complete documentation. Teams we work with are set up within 15 minutes. Try it for yourself for free or book a demo with us if you need help to get started.
Subscribe to our newsletter
The latest news, articles, features and resources of Onboardbase, sent to your inbox weekly